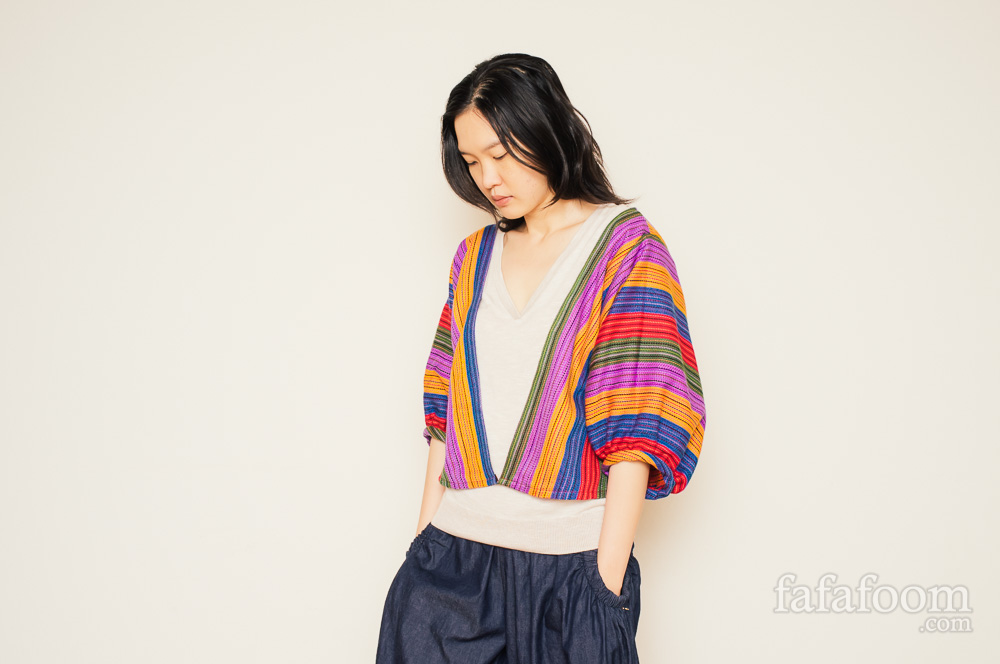
I often feel cold when I’m working on my DIY projects, choosing, cutting fabrics, and sewing on my kitchen table. I can wrap a blanket around myself, but it will slip away, crumpled on the floor soon enough. I can turn on the heater, but I don’t need it to warm the whole room, just a small section I’m in. I can also wear a long-sleeve sweater, but because it’s the kitchen, I go back and forth between sewing and washing dishes and I hate to roll up my sleeves a lot. So it’s time to make myself a DIY Bolero to keep me warm and cozy at all times when I’m working on my projects (and washing dishes :)
I frequently go to Kinokuniya bookstore at San Francisco Japantown, and back in 2010, I bought this Japanese magazine Cotton Friend Autumn 2010 edition. I wasn’t able to sew a thing back then, but I knew I wanted to try making some of these fun projects.
On page 30 – 35 on that issue, I was immediately in love with this bolero. It just looks so cozy and I LOVE the combination of the balloon sleeves, V front, and boxy, slightly cropped cut.
[shashin type=”photo” id=”12999″ size=”xlarge” columns=”max” order=”user” position=”center”]
The pattern for this project (and many other projects) is included, so now it’s time to actually make this DIY bolero after 3+ years of owning this magazine. The timing is just perfect. For the fabric, I chose two pieces of Peruvian textile blankets that we bought during our trip to Peru last year. The Peruvian textile I used for my DIY Maxi Skirt is long and wide. In contrast, these striped blankets were long but not so wide. The fabric width was barely enough for the torso backside pattern piece.
[shashin type=”photo” id=”13000″ size=”xlarge” columns=”max” order=”user” position=”center”]
However, once the fabric pieces were cut, finishing the whole project was relatively easy, thanks to the concise visual how-to on the magazine. After attaching the back side and front pieces, I sewed a bias tape surrounding the V-shape front. Then I attached the sleeves and gathered them. It took me approximately the same time I spent with DIY Maxi Skirt, around 5 hours. Here were some of the photos I took when I wasn’t so “in the zone”.
[shashin type=”photo” id=”13001,13002,13003″ size=”xlarge” columns=”max” order=”user” position=”center”]
Lastly, I attached a small hook and eye at the tips of each front sides (i.e.: at the base of the “V”). And it’s done!
[shashin type=”photo” id=”12682,12685″ size=”xlarge” columns=”max” order=”user” position=”center”]
I really, really love the balloon sleeves :)
[shashin type=”photo” id=”12683,12686″ size=”xlarge” columns=”max” order=”user” position=”center”]
I just remembered a Joker pose from a set of playing cards I had a long time ago, and I just had to try imitating it with this awesome DIY bolero…
[shashin type=”photo” id=”12684″ size=”xlarge” columns=”max” order=”user” position=”center”]
…but after that I mellowed down, unhooked the front, and just chilled out a bit, y’know?
[shashin type=”photo” id=”12687″ size=”xlarge” columns=”max” order=”user” position=”center”]
What do you think about the DIY bolero? I’m really happy that I kept that Cotton Friend magazine, I really am. And that magazine has so many more fun fashion projects to choose from! So many DIY projects, not enough time, right?
Thank you for reading, until next time,
Musank


Hi there!
I created a post about this bolero and I added the skirt. The link is: http://wp.me/p1REPU-Oe
I hope you like it.
Cathy the Bagg Lady
Cathy, thank you for featuring me again; I’m glad you like how these turn out :)
One correction (outlined in the 4th paragraph above): even though both textiles are Peruvian fabrics, they’re not the same piece. The maxi skirt was made from one piece of a rectangular fabric (the ratio between length and width was about 5:4). The bolero fabric, on the other hand, was made from two pieces of identical stripe fabrics which has the ratio of approximately 7:2. They’re like blankets or wide scarves.
But you’re right that both textiles are loose weave type, and the edges have to be secured by either zig-zag stitch or bias tape treatment to prevent fraying.
Thank you so much Cathy, I’m just happy to have your support! People like you make me want to keep doing DIY, no matter how much time I actually have for doing so.
Mira