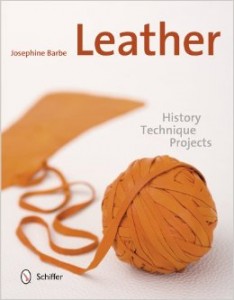
 Schiffer Publishing is really kind to send me Josephine Barbe’s “Leather: History, Technique, Projects”, a book that I’m curious about. I’ve been loving the ups and downs of doing my Fashion DIY projects, whether they’re garments or accessories. However, I’ve been avoiding leather as a DIY material. While I have leather scraps I collected over fabric outlet trips and garage sales, they’re still piled up neatly on the side. Leather isn’t a forgiving material when you are not sure what to do with them, and unlike fabrics, once you make holes in leather, they’re there permanently.
To the extend of becoming more familiar with leather, this book is a great resource with condensed useful information and bright, colorful photos. The tools required and projects showcased are also useful and will serve as a checklist and inspiration for sewing enthusiasts and DIYers. I will briefly go over each of the three main sections of “Leather: History, Technique, Projects”.
1st section: History
I enjoy the concise history of leather manufacturing, the tanning process and the methods, different leather grain “pattern” identification, and various leather care in this section. The gem of this section is the comprehensive piece about leather tanning. I go from not knowing anything at all to being able to decently give an overview of general leather tanning process from animal skin to leather. This is because the tanning process section is repeated frequently with slight variations yet consistent outline since the early days to post-industrial revolution.
Identifying leather grains from various animals are also a great section, complete with zoomed-in pictures for better clarity. I wish there are more pages of those. The leather care and storage sections, while short, are incredibly useful for a novice like me. I can now iron a creased leather properly.
2nd section: Technique
This is where I got a little overwhelmed. While the book “promises” that you can start working with leather with a few simple tools, 4 pages dedicated to various tools are a bit much for me. I’m sure I can pick and choose a handful of items I need to work on a few projects, but that’s something I have to edit on my own, perhaps with a few trials and errors. Nevertheless, the description underneath each tools are very helpful.
Basic techniques such as how to treat leather surface (which you need to have a tool for), harden leather, as well as mark / cut / thin the edges are covered just enough (i.e.: briefly). However, I tend to skip over them and go straight to the basic sewing techniques and how to attach buttons, zippers. There’s a handy table of which needle to use to sew leathers with different thickness with a sewing machine, and there is a comprehensive section of different stitches if you prefer hand sewing.
3rd section: Projects
his section starts with an overview of “The Origin of Clothing”, and how to work with patterns when you’re using leather as clothing material. From there until the end of the book, various projects with 3 different difficulty levels are showcased.
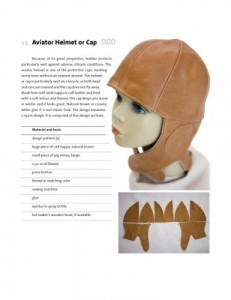
 TThe first leather garment project is at level 3 of difficulty, and it’s an Aviator Helmet or Cap (pictured right). While the aviator helmet is pretty, the step-by-step instructions serve more as an overview instead of guide-you-by-the-hand instructions. Not all steps are accompanied with a picture; so I leave it to myself to figure out the not-accompanied-by-any-picture steps.
Perhaps it’s because I’m a novice who’s still intimidated with the prospect of starting out wrong with my first leather project, maybe I’m just that much of a visual person, but I believe giving more pictures associated with this project (especially to give close-up views of those intricate, detailed steps) will benefit more readers. Intermediate to advance sewers will have not much problem following the steps. The rest of the leather garment projects cover leather T-shirt, vest, jacket, skirt, a brief overview of pants making, and footwear (shoes, slippers, moccasin). They’re usually at level 2 and 3 difficulty.
The handbags projects section is more friendly, in my opinion. Also covered in this sub-section is a pencil case and book cover projects, either which I think will be perfect as my first leather DIY project. I think I need to do a slight modification to the pencil case so the pencils / brushes / pens don’t fall out easily when you carry them around or put them inside your bag, but it’s a gorgeous project to do.
Home Accessories projects section is sure to be a hit for home decor sewing enthusiasts. I like many of them, most of which are set on level 1 or 2 difficulty. If only I have a house, I will definitely do several home accessories leather projects.
The Leather Jewelry projects section is not the strongest section of the book, I don’t think. The designs are probably not the ones I’m going to 100% copy. However, the overview of steps are great first steps for me to start making jewelry one of these days.
So there you go! I’m slightly less intimidated with leather now. I just need to pick a few simple tools and choose a simple project to start with so I can gain a bit more experience and confidence before tackling more challenging projects. Maybe one day, I’ll make a leather jacket. Who knows? One thing for sure, I definitely have a better understanding of leather history and how to identify different leather grain “patterns” next time I’m at a leather or fabric store.
Thank you once again to Schiffer Publishing for sending me Josephine Barbe’s “Leather: History, Technique, Projects”. It’s a book that will be more rewarding as time goes by, just like how leather looks better the more you wear them.
Thanks for reading, until next time,
Musank
