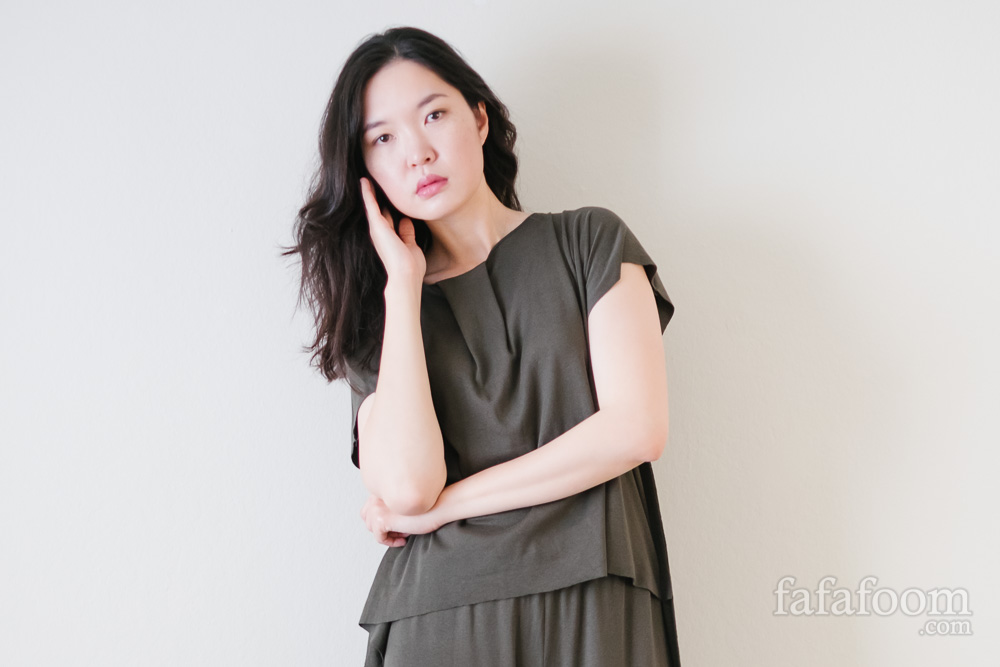
My first attempt at DIY Leisure Wear involves a dark green high-low rectangle top with box pleat details with matching elastic waist pants, plus a pair of furry slippers. This DIY project marked my first time making pants! Photos by Christian Hadidjaja.
Whenever I’m working at home, I have a specific dilemma. I can wear one of the many tee and sweatpants combos or any of my sleeping ensembles, but that doesn’t feel right. I want to be comfortable, yes, but I also want to look presentable to other people. I don’t want to feel like I need to check my outfit and change into something else whenever I suddenly need to jump into a video conference, host an unexpected visitor, or heck, even take a package from a FedEx guy.
So I tried creating this ensemble out of dark green jersey knit remnant I got from Isda & Co. several years ago, when it’s still in business. It was a BIG remnant, big enough to have a healthy 1 yard of 54″ wide fabric as leftover afterwards. Making this top and bottom combo took me around 25 hours over 3 weekends. Creating the furry slippers was more straight-forward: it was done in about 3 hours, with the majority of it spent fitting the rabbit fur shape onto the top of the slippers.
DIY Leisure Wear Materials
Here’s the complete list of materials I needed to create this set:
For the top and bottom:
1. Dark green jersey knit fabric (2.5 yard should be plenty for this ensemble)
2. Basic rectangular top pattern (I have mine from a Japanese magazine “FEMALE”)
3. Basic elastic waist pants pattern (mine is also from “FEMALE” magazine)
4. Elastics for waistband
5. Tracing paper for fabric stabilizer (such a life saver for sewing knits)
6. Scissors to cut the rounded corners
For the furry slippers:
1. One pair of basic hotel slippers (I got mine from a B&B accommodation)
2. Rabbit fur (I got mine from Hide House at Napa several years ago)
3. Fabri-tac
4. Small seam ripper – instead of scissors – for more precise cut
Photos by Christian Hadidjaja.
[shashin type=”photo” id=”27852,27850,27854,27860″ size=”xlarge” columns=”max” order=”user” position=”center”]
Dark Green Ensemble: Progress Summary and Design Details
Thanks to the ready-made patterns from FEMALE, I got relatively quick at laying down the fabric and cutting them for both the rectangular top and elastic waist pants. I made two impulsive decisions along the way. First, I decided to create a disconnected high-low cut for the top. Then, I created matching quarter-circle rounded corners for the top’s back and the pant’s outer seams.
The hardest part was running these fabric through the sewing machine. I put tracing paper underneath my fabric as stabilizers, and it worked…although not 100% of the time. It’s alright, though. I’m glad I learned the wonder of tracing paper during DIY Scarf Top with Kimono Sleeves days.
Here’s the list of design details that make it to the final result:
- center box pleat at center front neckline
- inverted box pleat at center back neckline
- shoulder seams resting on shoulder blades area
- 1″ seam on the sides
- disconnected high-low top with rounded corners
- matching rounded corners for the pants’ outer seams
[shashin type=”photo” id=”27855,27856,27857,27853″ size=”xlarge” columns=”max” order=”user” position=”center”]
Furry Slippers: How-To Summary
The how-to steps are actually pretty simple. First, I made a pattern of slipper’s top area with some tracing paper. Then I match the patterns on the rabbit fur piece, careful not to be wasteful.
Next, I cut the fur piece slightly larger than the pattern and glue them on top of the slippers with Fabri-tac. Using a seam reaper, I trim the fur more precisely, following the shape of the slippers’ top. I’m also adding small patches of fur here here and there at several “bald” spots. That’s about it!
[shashin type=”photo” id=”27858,27859″ size=”xlarge” columns=”max” order=”user” position=”center”]
Lessons Learned during DIY Leisure Wear
1. For the love of God, use tracing paper for fabric stabilizer when sewing knits…or perhaps, get a serger.
2. Forgetting seam allowance when cutting can have consequences, especially for the neckline part.
3. That being said, forgetting seam allowances can bring on interesting challenges with creative results. I would not end up with with box pleat details, wide open back neckline, or shoulder seams resting on shoulder blades if these challenges didn’t happen.
I’m really happy with the result; now I won’t have to worry about looking too “ready for bed” whenever I’m working at home. Even when there’s unexpected friendly guests, quick errands to do, or answer the door for FedEx shipments or apartment inspections, I no longer need to yell “Just a second!” and quickly changed into something more appropriate. Because I believe I already look presentable with this outfit :)
[shashin type=”photo” id=”27862,27866,27861″ size=”xlarge” columns=”max” order=”user” position=”center”]
So what do you think? Let me know if you have questions!
Thanks for reading; until next time,
Musank
Photos by Christian Hadidjaja.

